Creating Glitch Art With Second Life Images
By
18:00:00
One of the current trends in digital art is the intentional corruption of image files to simulate interferences, or a broken image. Rather than throwing one's arms in the air in frustration at a corrupted file, glitch art embraces these errors and turns them into art. This is of course possible to do with images taken in Second Life, and if you'd like to turn your preciously refined snapshots into a different kind of art form thats all the rage, then follow this tutorial on creating glitch art with Second Life images.
Audacity
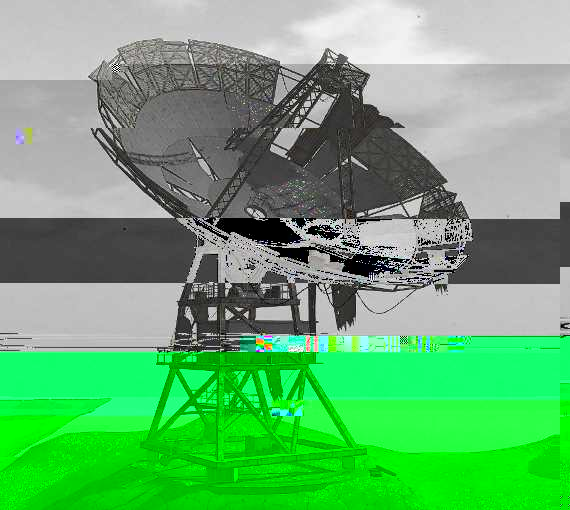
To create your glitch art you will first need a snapshot saved as a BMP file and edited to your liking. Secondly you'll need to install Audacity, which can be downloaded for free by following the link. Although Audacity is an audio editing software it works well for opening BMP image files and using its features to add errors to the image.I took the above image at The Great Fissure in Second Life, which I then cropped and tweaked a little in Gimp. Once you have downloaded Audacity follow the steps below. You can click on the pictures to see full size.
1/ Start up Audacity then select File > Import > Raw Data.
2/ Navigate to the BMP image you want to use then select Open. In the window that opens (see above), select U-Law from the first drop down menu and Little-endian from the second. Now click Import.
3/ The image will appear in Audacity as if its an audio file, and if you want you can press the play button to listen to it (it will probably sound terrible). Drag your cursor over part of the 'audio' wave (highlighted in red), avoiding the beginning as this contains important information that allows the file to be opened.
4/ Now click on the Effect menu and from the drop down list select one of the editing options. There is some trial and error here to find which of the Effects options creates distortions to the image that you like.
6/ In this example Change Pitch has been selected and in the opening window shown above I randomly played with the settings before hitting OK.
7/ Drag your cursor over another section of the 'wave' to select another part of the file, and then select another option from the Effects menu. In this example Wahwah was chosen. When you have tweaked the settings hit OK again.
8/ Select random parts of the file and then select other options from the Effects menu. Its probably best not to do this too many times to begin with, until you have an idea how the image will be affected. There will be some trial and error involved, although the whole process doesn't take too long, so creating new images from scratch if you need to isn't too time consuming.
9/ When you are ready, select File > Export and the window above will open. Name your file and give it a BMP extension, highlighted in red. Navigate to the folder where you want to save your image and click Save.
12/ If everything has gone to plan you should see a window as above. Click Yes.
13/ The above window will now appear. Click OK and your image will be saved to your PC.
This is how the image from Audacity looked when I saved it to my PC. Sometimes when you try to open the image in Window's image viewer it may not recognise the file. If this happens try opening it in Gimp or Paint and saving it again, maybe as a PNG file. Sometimes unfortunately you'll just have to start again.
Snorpey.github
Using Audacity is not the only way to create Glitch art. In fact there is an online resource at http://snorpey.github.io/jpg-glitch which can be used to further work on an image after exporting it from Audacity, or the website can be used by itself. The above image shows the Audacity image after being worked on further at Snorpey.
Using the website is quite intuitive. First you'll need a PNG or Jpeg image to upload (not a BMP file this time), and then its a matter of adjusting the four sliders above the image to get the result you want. There is also a Randomise button to experiment with.
Once you have finished editing the image hit the download button and then click on 'download bitmap file', to save it to your PC.
The above image shows the same subject edited entirely on Snorkey without using Audacity. Although the website is very effective and easy to use, the end results are different to what Audacity produces, so it will be a personal choice what you use and whether you mix and match both approaches.You may also find Snorkey has a limit on uploaded file sizes.
Thats all there is to creating your own glitch art, so have fun experimenting with your Second Life snapshots and if you feel like it do share them with me online.


