This is a simple tutorial which will hopefully be a good introduction to anyone new to Inkscape, although it does assume some familiarity with the more common Inkscape tools. Although a neon sign can be made in other software such as Gimp, one of the advantages of using Inkscape is that you do not have to decide the final size of the image until you have completed what you are doing, as we will see.
Creating The Neon Sign
1/ Open Inkscape and resize it to fit your screen. Press '5' so that the page area fits the Inkscape window.
2/ Select the text tool to the left of the window (F8) and type the text for your neon sign.
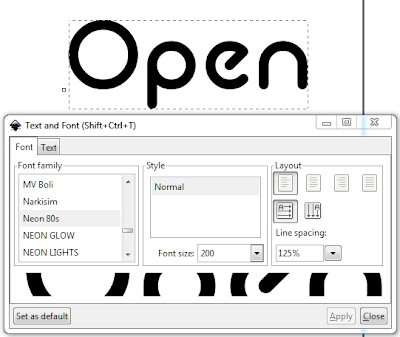
3/ From the Command Bar select the Font tool ( Shift >Ctrl >T) to choose the font for your sign and the font size. From the window that opens (see image above) select the font and font size you want to use.
The font selected for this tutorial is called Neon 80s that I downloaded from Fontspace, a website with a good selection of free fonts.
After you have decided on your font and font size click Apply.
4/ Choose the colour for your font from the palette at the bottom of the Inkscape window. Then hit Ctrl>D to make a copy of the text object.
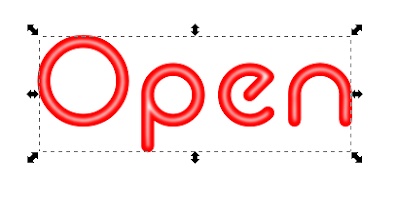
5/ The copy of the text object will be above the original, and we are going to use this copy to create the highlights of the neon sign. We do this by first changing the colour to white, then selecting Ctrl>Shift>( which will inset the text.
To get the highlight looking just right you may need to hit Ctrl>Shift>( a few times. Be careful however not do this too many times because the result will become unpredictable and you will need to restart this step.
6/ Once you are happy with the highlight bring up the Stroke and Fill panel by hitting Shift>Ctrl>F. Now using the slider add a little blur to make the highlight more realistic, (see image above).
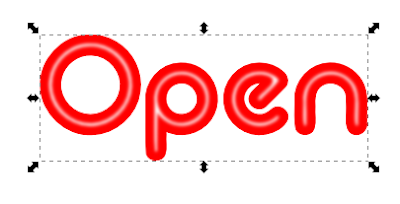
7/ The text of a neon sign appears to glow, so we will create this effect by adding another copy of the original text object and then, instead of using the Inset tool (Ctrl>Shift>( ), we will use the outset tool.
8/ To make a copy of the original text object make sure it is selected and then hit Ctrl>D. You may need to zoom in to make sure you have the right object selected.
9/ Send the copy to the back of the other objects by hitting the Page Down key a few times. Now use the outset tool to expand the object by hitting Ctrl>Shift>) a few times, until you are happy with the appearance of the object, (see image above).
10/ Hit Shift>Ctrl>F to bring up the Fill and Stroke panel again, and use the blur slider to make the object seem like the glow of the text layer. In the example here a blur of around 5 was used.
11/ All the neon sign needs now is a background, so select the box tool from the Toolbox to the left of the Inkscape window (or hit F4), and drag your cursor over the neon text until you have a size that suits you.
Give it a black fill, then send it to the back of the objects by hitting the Page Down key a few times. The neon sign is now complete, and we just need to export it as a bitmap.
Exporting the Neon Sign
To export the neon sign, select File>Export (or Shift>Ctrl>E) and in the window that opens you will see you can choose the size of the image to be exported, see image above). Once you have chosen the size for your image hit the Export button.
If your sign is to be used in Second Life, all you need to do now is upload the image and add it to a prim. The above image shows the sign created here placed in my gallery close to the cinema, which I hope shows how effective Inkscape can be in creating neon signs, particularly when used in Second Life.


